Before Your Stone Flooring Arrives
A home has many visitors, prepare for all, including our installers.
Here they come, if it isn’t the in-laws over for Thanksgiving it’s the neighbors out on the deck for the annual Fourth of July barbecue and it’s up to you to get your home ready for their arrival.
Thus, owning a home is all about being prepared. The coming arrival of new flooring is no exception. Knowing what to expect and being prepared will also be a lot less stressful on you, your family and your home.
Recommendation #1: Let our pros take it from here.
Installing this type of floor is heavy, difficult work; labor intensive and extremely exacting.
It’s simply not for the do-it-yourselfer. We strongly recommend you call upon our reliable professionals to install your stone floor.
That way you can be assured of a beautiful, efficient and correct installation.
However, while installing natural stone flooring is a skill that is developed through years of experience, your understanding of the basics of installation will increase your knowledge of the process, and enhance your confidence in the professionals working in your home.
So please allow us to cover some of the basic steps our professional installers will perform.
They’ll begin by checking out the state of the substrate.
As with most flooring products, the first step is to prepare the substrate, the surface on which the stone tile will be laid.
Should your subfloor require additional labor to allow us to meet industry and state requirements for installation, we will discuss this with you prior to any additional work being done.
With cement subfloors, our installers can apply the mortar directly to it and simply lay the tile.
Wood subfloors, however, usually require a CBU or cement backer unit for support and a moisture barrier.
It’s important to note that movement in the substrate material can sometimes occur. For example, water penetrating the grout and/or freezing and thawing temperatures can sometimes cause tile to rise, crack or chip.
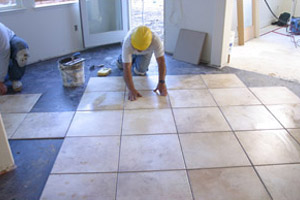
Now it’s time to lay your stone.
Our installers will measure the area and snap chalk lines for an accurate layout, then determine which pieces of tile will need to be cut to fit the area.
Tiles that need to be cut are measured and marked with a pencil.
Our installers then use a wet saw with a diamond blade to cut through the stone tile. Once the layout has been determined, our installers can begin setting the tile.
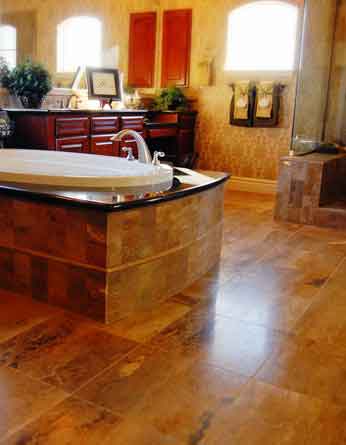
Your beautiful new stone floor is about to be born.
Thinset mortar, which is a cement-based adhesive, is applied to the surface with a notched or grooved trowel.
The tile is then placed into the thinset and pressed firmly into place.
Please note that imperfections in your subfloor will require differing amounts of mortar to be applied. This installation, commonly know as a medium bed installation, is more time consuming and thus more costly than a typical tile installation. However, in order for your stone installation to be done properly, this is a must.
Decision time: should we grout, wedge or butter?
Depending on the type of tile, stone tile may be installed with narrow grout joints, meaning the tiles are laid very close to each other on all sides.
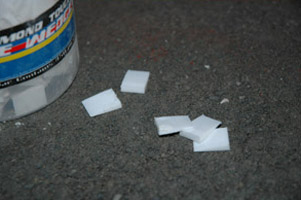
If it is a large tiled area, our installers may use plastic tile wedges or spacers to maintain consistent spacing between each tile. In small areas they may not use these at all.
Depending on the circumstance, our installers may also back butter the back of the tile with thinset mortar which will strengthen the bond between the tile and mortar already laid on the substrate.
We take accuracy to the next level.
As our installers move along setting the tile, they continually check to make sure the newly tiled area is as level as possible.
Since stone tiles vary in thickness and size, the amount of thinset mortar applied is adjusted where needed.
The last step is all about grout.
After all the tiles are set and the thinset mortar has fully cured, our installers fill the joints between the tiles with grout.
Both sanded and un-sanded grouts are used in natural stone installations.
The type of grout used is determined by the tile, grout joint width and particulars of the installation.
The grout mixture is spread over the tiled area with a grout float to fill in all the joints.
A sponge is then used to remove excess grout from the surface of the tile, while leaving the grout in the joints to cure.
And that is how your beautiful natural stone floor is professionally installed.
What to know and do before installation day
Relocate your furniture.
Remove all furniture and other objects and materials from the areas to be floored. Before moving, you’ll also need to empty the contents of china cabinets, closets and the like.
What’s to be done with your present floor covering?
Please consider how your old floor covering will be taken up and disposed of. This can be a time consuming and messy task. We will be happy to discuss removal options with you.
If you prefer to remove your present floor covering yourself, do it at least one day prior to installation to allow for cleanup and floor preparation. If removing old carpet, please leave tack strips in place and pull the staples out of the floor from the original pad.
Now turn your attention to the trim.
You should know that, in many cases, moldings and baseboards need to be removed for stone installation. Our installers will do this for an additional charge but will not be responsible for damage or breakage due to dry or brittle wood.
Painted baseboards, woodwork and paint may need retouching after the installation is complete. If necessary, this is your responsibility.
Get expert council on your sub flooring.
Your existing sub floor may need to be prepared to receive the stone, or a new sub floor may be required. This is a job best left to the professionals and, again, we can help you with these decisions.
Include a door plan in your preparation.
When stone flooring is installed, there’s always the possibility that the doors, especially closet doors, basement and bedroom doors, may not clear the new floor and swing free.
Our installers may remove doors in order to install the stone and re-hang them at an additional cost. If there is a clearance issue you may want to arrange for a qualified carpenter to shave or cut down your door(s) after the installation of your new stone floor.
Don’t let clean-up be a toss-up.
Installing new stone flooring will produce waste. These materials will be collected and disposed of by our installers at an additional cost.
What to know and do during installation day
On installation day be home and handy.
Be prepared to be at home the day of installation and be available in case our installation crew has questions. Your presence will insure that the correct stone is installed in the right areas. Because it is difficult to estimate the length and circumstances of each job, we may not be able to give you an exact time of arrival but we will provide a time frame.
Your family is our concern.
Our installers will use a variety of tools and techniques that can make the work area hazardous. Please make sure that your children and pets are kept out of the work area on installation day.
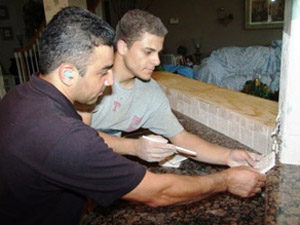
Follow through with a walk-thru.
We recommend that, prior to the completion of the installation; you walk thru the job with our installation team. This will give you the opportunity to ask questions and be clear on any final details.
What to know and do after installation day
Clear the air.
If you are sensitive to dust and odors, good ventilation should be established for 48 to 72 hours after installation.
Being prepared is the result of being informed.
We want you to be as well prepared as possible for the installation of your new stone flooring. To that end we’ve assembled the most knowledgeable sales people and the most experienced installers to provide you with solid information, reliable resources and proven solutions.
We hope that the information we’ve featured here leads you to a better understanding of how to prepare for installation day.